Harvesting tomatoes and taking them straight to the kitchen is one of the greatest joys of the summer, and one that most gardeners wouldn't be without. In the peak summer months, there's a kind of pride that comes with growing tomatoes that are tastier, juicier, and fresher than grocery story fruit for a small fraction of the cost. Tomatoes are accessible for growers, too; whether you're growing from seed in a cold climate, planting into pots, or growing neat rows of tomatoes, there's a tomato variety that suits your situation and tastes.
With many varieties and growth habits to pick from, the first step in growing tomatoes is choosing what kind you want. This guide starts there and covers everything you need to know about growing tomatoes, from picking a variety and planting to pruning, staking, plant care, and harvesting.
Skip Ahead: Tomato varieties • Determinate vs indeterminate • Growing and planting tomatoes • Staking tomatoes • Tomato spacing • Pruning tomatoes • Growing from seed • Tomatoes in pots • Tomatoes in bags • Tomato plant care • Harvesting tomatoes • FAQ
Tomato varieties
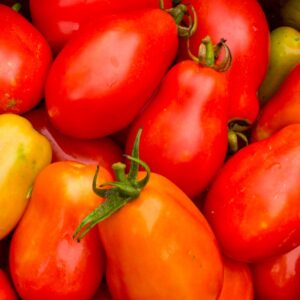
There are four main types of tomato plants: paste tomatoes, cherry tomatoes, grape tomatoes, and beefsteak tomatoes. Within that, tomatoes can be determinate or indeterminate; each type of tomato has determine and indeterminate varieties.
Here are the main types of tomato varieties to choose from:
- Paste tomatoes: Paste tomatoes are a kind of plum tomato, ideal for making sauces and canning. Roma is the classic variety, and San Marzano is the go-to for Neapolitan style pizza sauces. Most paste tomatoes are determinate, though San Marzanos are indeterminate.
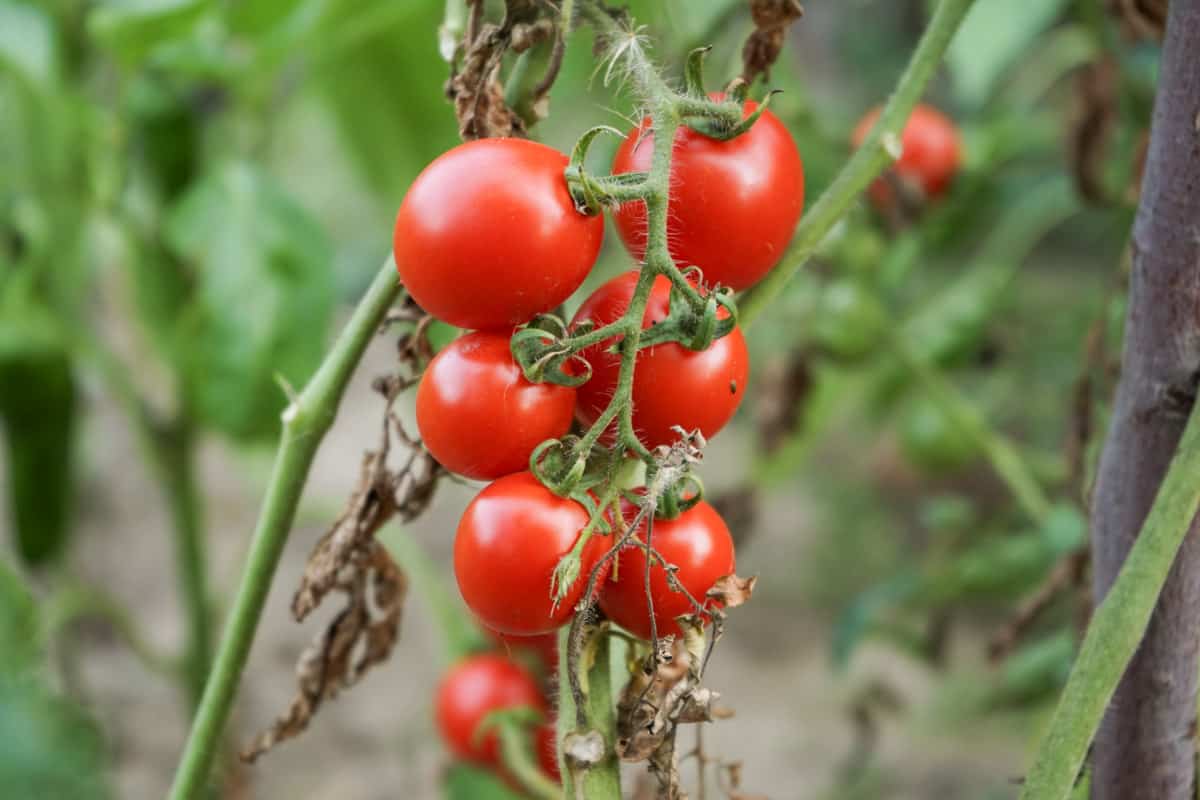
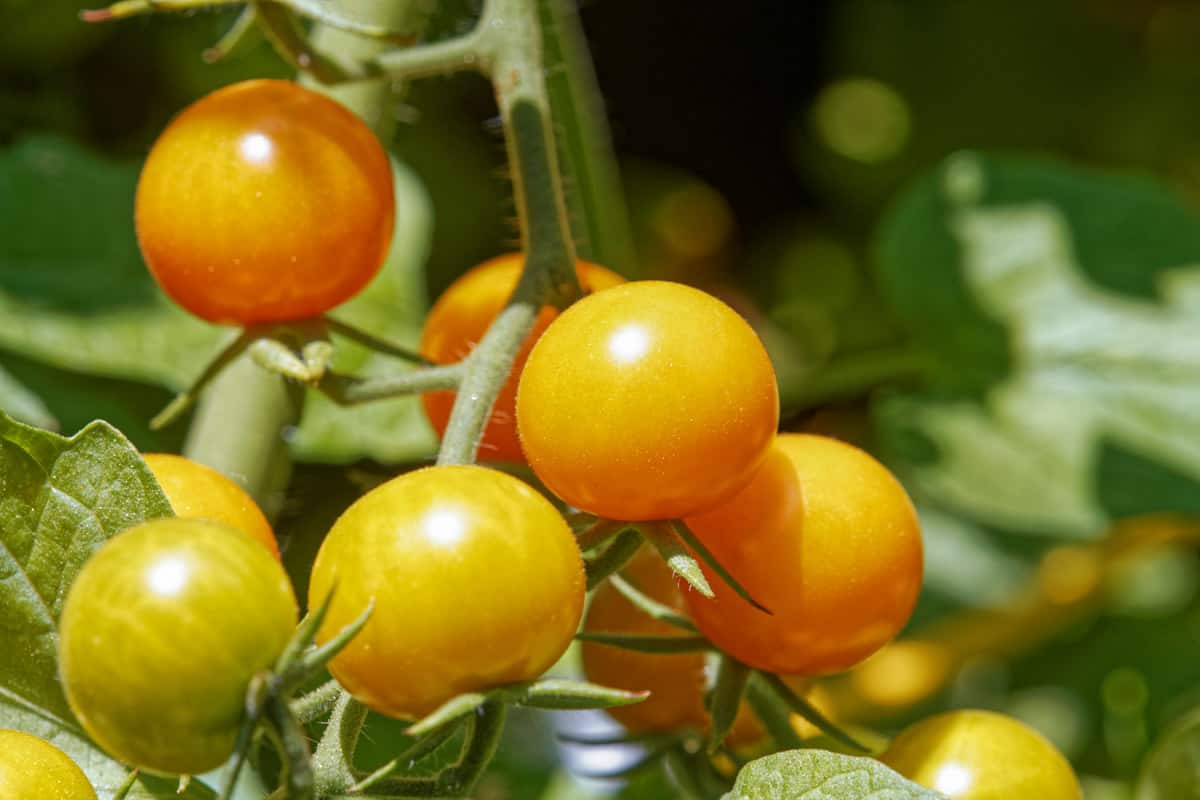
- Cherry tomatoes: Cherry tomatoes are used for sauces and salads. They are small, round, and watery with a thin skin and sweet flavor. Cherry tomatoes can be bright red, but they also come in green, yellow, and purple varieties. Tiny Tim, Sungold, and Gardener's Delight are among the most popular cherry tomatoes.
- Grape tomatoes: Grape tomatoes are meatier than cherry tomatoes, have a slightly thicker skin, and have a more oblong shape. They're another kind of plum tomato, and they can be used in sauces or eaten fresh. Popular varieties include Juliet and Jellybean.
- Beefsteak tomatoes: Beefsteak tomatoes are the large, juicy slicing tomatoes we use for burgers. They have a thicker skin, which makes them well suited to roasting. Most beefsteak varieties are indeterminate. Popular options include Oxheart, Cherokee Purple, and Brandywine.
Determinate vs indeterminate tomatoes
All types of tomatoes have determinate and indeterminate varieties. Which you choose depends on how you want to harvest tomatoes and how long your growing season is, and it will determine how you prune tomatoes.
Determinate tomatoes, also known as bush tomatoes, grow to a set height and produce all of their fruit at the same time. Determinate tomato varieties reach about four or five feet tall and grow quickly, so they are ideal for small spaces and cooler climates where the growing season is shorter.
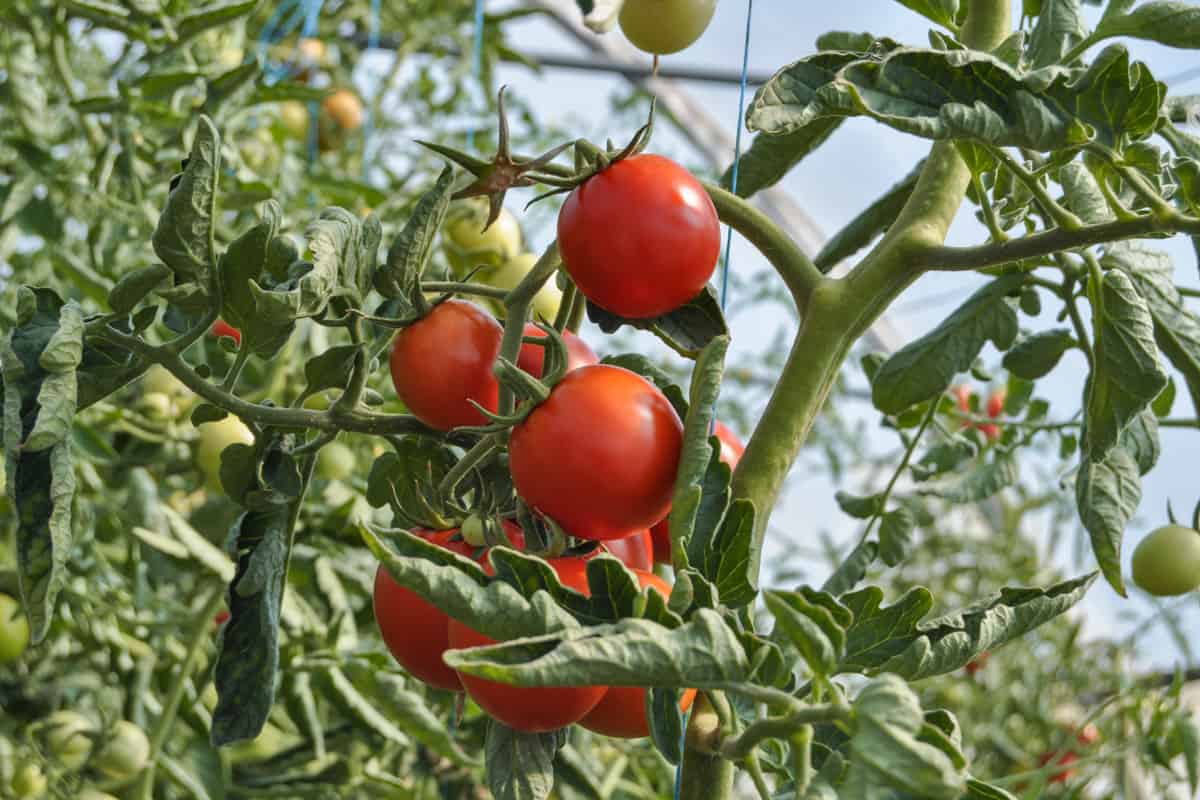
Indeterminate tomatoes, also known as vining tomatoes, keep growing until the season ends. Many cherry tomatoes, beefsteak tomatoes, and paste tomatoes are indeterminate varieties. Indeterminate tomatoes are ideal for warm climates and fresh eating, as they produce fruit continuously all summer.
For canning tomatoes, determinate varieties are ideal because they produce a mass of fruit all at once. Indeterminate tomatoes are preferable for fresh eating, as they provide a continuous harvest.
Growing and planting tomatoes
Though it's common to plant tomatoes just after the last frost date, it's best to plant tomatoes two to four weeks after the last frost. Tomatoes transplanted too early in the season suffer from the difference between daytime and nighttime temperatures. It may seem counterintuitive, but tomatoes planted out later are likely to outpace tomatoes planted as soon as the frosts pass.
If you've grown tomatoes from seed, harden off tomato seedlings for at least a week before planting. This reduces the likelihood of plants going into shock or simply languishing for weeks after planting. To harden off tomatoes, keep them in a greenhouse or coldframe for at least a few days, or move them outside during the day and take them back inside at night. Then allow them a week or so of being outside full-time before planting. These are very tender plants, so they do need some coddling at this stage.
Get 9 Free Companion Planting Charts
All of the companion planting on Make it Seasonal, consolidated into handy PDFs that you can save to your phone.
Click through to access the whole collection
When you're ready to plant, dig a deep hole and plant the tomatoes nearly all the way up to the first set of leaves. Like other Solanaceae plants, tomato stems are able to grow new roots when in contact with soil. Planting tomatoes deeply allows them to form those extra roots, access more nutrients, and grow sturdier. However, leaves that are in contact with the soil can develop disease and rot; it's best to prune those off.
Stake the tomatoes when you plant them, and tie them in if they're tall enough. This will prevent you disturbing the roots later on, once the plant is established. It'll also mean that tomatoes have support before they need it, preventing broken or damaged branches.
After planting, water the tomatoes in well. As they get established, keep an eye on the soil to ensure it doesn't dry out.
Tomato plant care
Caring for tomatoes is straightforward; the major demands are regular watering and pruning. Here are some general tips for growing tomato plants that produce masses of healthy fruits:
- Full sun: If planting tomatoes in rows, orient the rows north to south. This way, as the sun rises and falls, the plants won't cast shade on each other.
- Rich soil: Tomatoes are heavy feeders. If your container or raised bed soil isn't already rich in organic matter, dig in a few extra inches of compost.
- Mulching: Mulching tomatoes with a few inches of dead leaves, straw, or wood chips can help retain moisture in the soil. This is especially helpful in very hot climates where soil temperatures climb quickly.
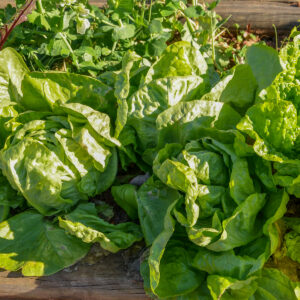
- Watering: Watering tomato plants regularly is necessary during dry spells and weeks with less than an inch or so of rain. To maintain consistent moisture, you can use a watering spike or similar device, or plant tomatoes next to a tomato companion plant like nasturtiums that will shield the soil. When watering, aim for the soil; getting tomato leaves wet can encourage disease. On very hot days, the water evaporating can also kill the leaves.
- Pruning: Tomatoes grow very quickly, and indeterminate varieties require regular pruning.
- Tying in: Bush or determinate tomatoes usually don't require support, but indeterminate (vining) tomatoes do. Tie in leader stems regularly to maintain neat plants and support the heavy fruits.
If you want to fertilize your tomato plants, do so only when planting and when fruits start to set. Homemade compost tea or comfrey tea work beautifully. If you want to use a packaged option, opt for a more nitrogenous fertilizer (like composted manure or blood meal) early in the season to support leaf growth. Once the plants flower, switch to a more potassium and phosphorous rich fertilizer like bone meal.
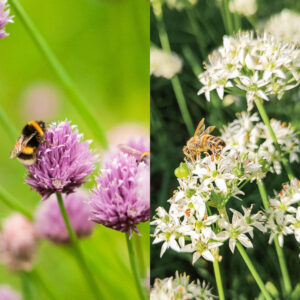
Tomatoes self pollinate, so there's no need to plant multiple tomatoes together or plant them next to other flowers-- although companion planting with tomatoes can help you to grow a better crop. If your tomatoes are producing flowers but not fruit, you can hand pollinate them. Unfortunately, tomatoes that flower but don't fruit are likely suffering from too much heat and too little water, or too much cold and wet. Tomatoes like warm weather, but they won't fruit in temperatures above 85º F.

Staking tomato plants
There are a few ways to stake tomatoes: using single stakes, the Florida weave, or training with twine. For traditional staking, you'll need about 8' tall stakes. When installing, drive the stakes at least a foot into the ground to keep them secure.
For each method, you'll need to tie the tomatoes into their supports every six inches or so. This is easily done with garden twine, but avoid using string, metal twist ties, or anything else that might cut into the plant.
- Single staking tomatoes: This method trains each tomato plant up its own stake. To do this, place the stake about half a foot behind the tomato and tie it in when the plant has reached about a foot in height. Add ties every six inches throughout the season. This approach works best with determinate tomatoes whose side shoots don't need supports.
- Florida weave: Installing a Florida weave is best done immediately after planting tomatoes. To make a Florida weave, sink one stake into the ground at either end of your row. Add an additional stake in a straight line after every second or third tomato for added stability. To support the plants, tie your twine onto one of the end stakes, weave it behind the first tomato plant, in front of the next, behind the next, and so on. Once you reach the middle stake (or the end of the row, if you're not using a middle stake), loop the twine around the last post and go back around the tomatoes in the opposite direction, so that each tomato has twine in front of and behind it. Tie the twine back into place on the same stake it started at. The two rows of twine will effectively pinch the tomatoes into place. Repeat this process every foot high as the tomatoes grow.
- String supports: If you're growing tomatoes in a greenhouse or can errect a tall beam above your tomatoes (7' or 8' high), you can train each plant up its own string. To do this, tie the string onto the beam or pole above the tomatoes and run it straight down to the ground at the base of the tomato. Either bury it under the tomato when planting or stake it firmly into the ground next to the plant. From there, you'll simply train the plant to spiral up the string as it grows. Paired with diligent pruning, this method provides excellent air flow for tall indeterminate tomatoes.
Metal t-posts work well as stakes because they're sturdy and provide notches for the twine to fall into, adding extra support. Bamboo is good option for single staking.
Pruning tomato plants
The best practices for pruning tomatoes vary for determinate and indeterminate varieties. Before we get into how to prune tomatoes, here are a few basics you'll need to be familiar with:
- Sun leaves: Sun leaves grow horizontal to the main stem, or leader. They're easy to identify by the 90º angle at which they branch out. These branches won't produce fruit, but they will soak up sun and feed the plant.
- Suckers: Suckers are branches that grow at a 45º angle between the leader and the sun leaves. If they're allowed to grow, they will turn into extra leaders that produce their own suckers and flowers.
- Flowers: Flowers grow on their own branches off of the main leader.
To prune determinate tomatoes, pinch or cut off all of the suckers below the first set of flowers but leave the sun leaves. This prevents the plant from putting energy into producing extra, unnecessary branches. However, do not prune above the first set of flowers, as this will sacrifice potential future fruits.
When you prune indeterminate tomatoes, start by cutting off excess any young suckers below the first set of flowers, as well as low-growing branches that are touching the soil. You can leave one or two suckers that will grow on to become new leaders and produce more fruit. Do not prune the sun leaves. As the season progresses, continue to prune off all new suckers. Otherwise, indeterminate (vining) tomatoes will sprawl horizontally and become very difficult to maintain.
As the season draws to a close, cut the tops off of indeterminate tomatoes. This will stop them from producing new vertical growth and encourage the plants to put more energy into developing the existing fruits.
Finally, if you have unripened green tomatoes at the end of the growing season, cut back any leaves shading out the fruit.
Read More: When and How to Prune Tomato Plants
Tomato plant spacing
Bush tomatoes are bred to be compact and can even be grown on patios. Vining (indeterminate) tomatoes need much more space, as their multiple leader stems branch out and grow tall. Here's how much space to give tomatoes depending on their type:
- Bush tomatoes: Space determinate tomatoes 12" apart in rows wide enough to walk through.
- Vining tomatoes: Space indeterminate tomatoes 18" to 24" apart if you are growing them up a trellis and pruning down to two or three leaders. If you do not want to prune your tomatoes regularly, still tie them into supports but space them 36" to 48" apart in rows wide enough to walk through.
Indeterminate tomatoes need support no matter how you prune them. It can be tempting to plant indeterminate varieties just a couple of feet apart, but only do this if you are willing to spend the time to regularly prune your tomatoes. Otherwise, the vining plants will sprawl at a shocking rate and you'll likely end up with far fewer fruits.
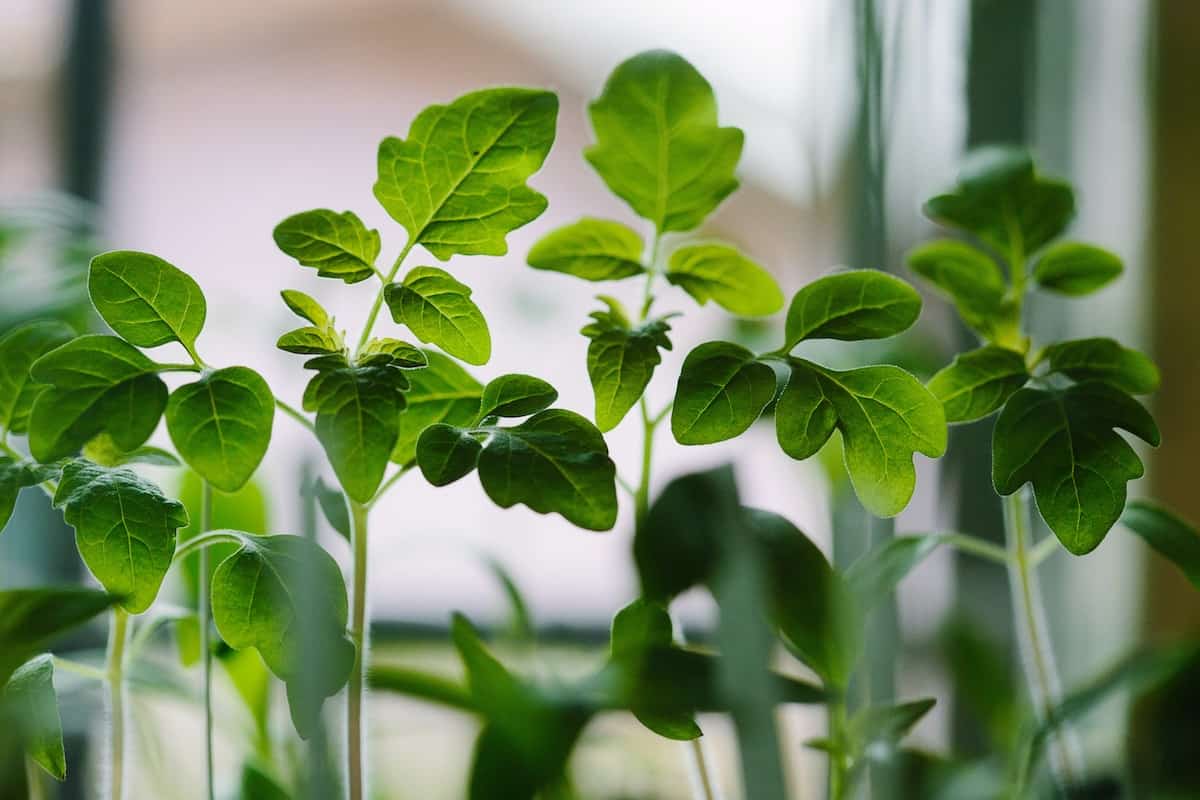
Growing tomatoes from seed
Growing tomatoes from seed is not only cost efficient-- especially if you save your own seed every year-- but in many areas, it's the only way to grow your own organic tomatoes. Luckily, tomato seeds are easy to start with a little added equipment.
In cooler climates, starting tomatoes indoors is the only way to grow tomatoes from seed while still being able to have a harvest before August. Direct sowing tomatoes isn't advisable in hardiness zones with less than five months between frost dates.
Aim to start your tomatoes six to eight weeks before the last frost. Sowing them too early will result in leggy, weak plants, so it's always best to avoid the temptation.
Here's how to grow tomatoes from seed, step by step:
- Sow tomato seeds ½" deep into 1" or 2" plugs, with two seeds per hole. Water them in thoroughly and cover with a plastic dome until they germinate. If your nighttime temperatures are very low, place the plug tray on a heated seedling mat. Seeds typically germinate in about a week.
- Check on the seedlings daily to ensure the environment under the dome isn't turgid. The soil shouldn't be consistently soaked, so remove the lid to shake out excess water as needed.
- Once seeds sprout, remove the dome. If needed, give the seedlings a plant light to ensure they get at least 8 hours of sunlight daily (and ideally 12 to 14.)
- When the first true leaves appear, pinch out the weakest plants so that there is one plant per plug.
- Bottom water the trays as needed. The soil shouldn't be constantly soaked, but it shouldn't dry out. Bottom watering encourages the roots to grow deeply.
- Pot up the seedlings once they have well-developed roots. Transfer them into pots or plugs that are only slightly larger, and top them off with a regular potting mix. Water them in.
- Pot up the plants as needed, once or twice more, before you move them outside. Only repot seedlings once they have formed healthy root systems filling their existing pots.
- Harden seedlings off after the last frost date by moving them outside during the day. Do this for a few days to a week before moving them outside full-time for a week. This will prevent transplant shock later on.
Once you've hardened off your seedlings and nighttime temperatures are consistently above 50ºF, you can move on to planting your tomatoes.
Growing tomatoes in pots
Bush tomatoes are ideal for growing in pots, though you can technically train both determinate and indeterminate tomato varieties to grow in containers. Growing cherry tomatoes in pots is particularly popular for small gardens and patio gardens, as the compact plants produce masses of small fruits.
To successfully plant tomatoes in containers, choose a pot that's at least 12" around and 12" deep or more. You can get away with growing well-pruned dwarf and bush tomatoes in 5 gallon pots, but bigger is better; if you can get a 10 or 15 gallon pot, your tomatoes will stay happy longer.
The main challenge with planting tomatoes in pots is maintaining moist soil. Adding a few inches of compost will help with this, as will planting into plastic or ceramic pots. Avoid terracotta pots, as these leach moisture from the soil. Pots dry out quickly even in the best circumstances, so it's worth using a watering spike or something similar if you're going to be away from the garden.
Growing tomatoes in bags
Growing tomatoes in grow bags is an excellent option for anyone who struggles with soil diseases like blight or has a small garden. They also allow you to move plants around as the sun moves or season changes. It's worth noting that all grow bags are made of plastic-- even fabric ones-- which allows them to hold wet soil without rotting.
If you want to use a grow bag, opt for a determinate or dwarf tomato variety; vining tomatoes grow too voraciously be contained. As with pots, opt for a larger bag: 10 or 15 gallons will enable the plant to produce fruit throughout the summer.
Using grow bags is similar to using pots; any tomato planted into a container will need extra compost and extra water. Here are a few tips for growing tomatoes in bags:
- Prune off low branches. This will reduce the risk of blight and other tomato diseases.
- Mulch thickly. Water retention is even more important in containers, and mulching will help.
- Position grow bags on grass. Avoid putting your grow bags on cement or other hot surfaces.
- Fertilize frequently. In addition to planting your tomatoes with extra compost and composted manure, consider using organic fertilizers every month or so: nitrogenous fertilizers (composted manure or blood meal) early on and potassium/phosphorous rich fertilizers when fruit sets (bone meal is one option.)
- Prune regularly. Nutrients are at a premium for tomatoes in containers, so prune aggressively to ensure that no nutrition is wasted.
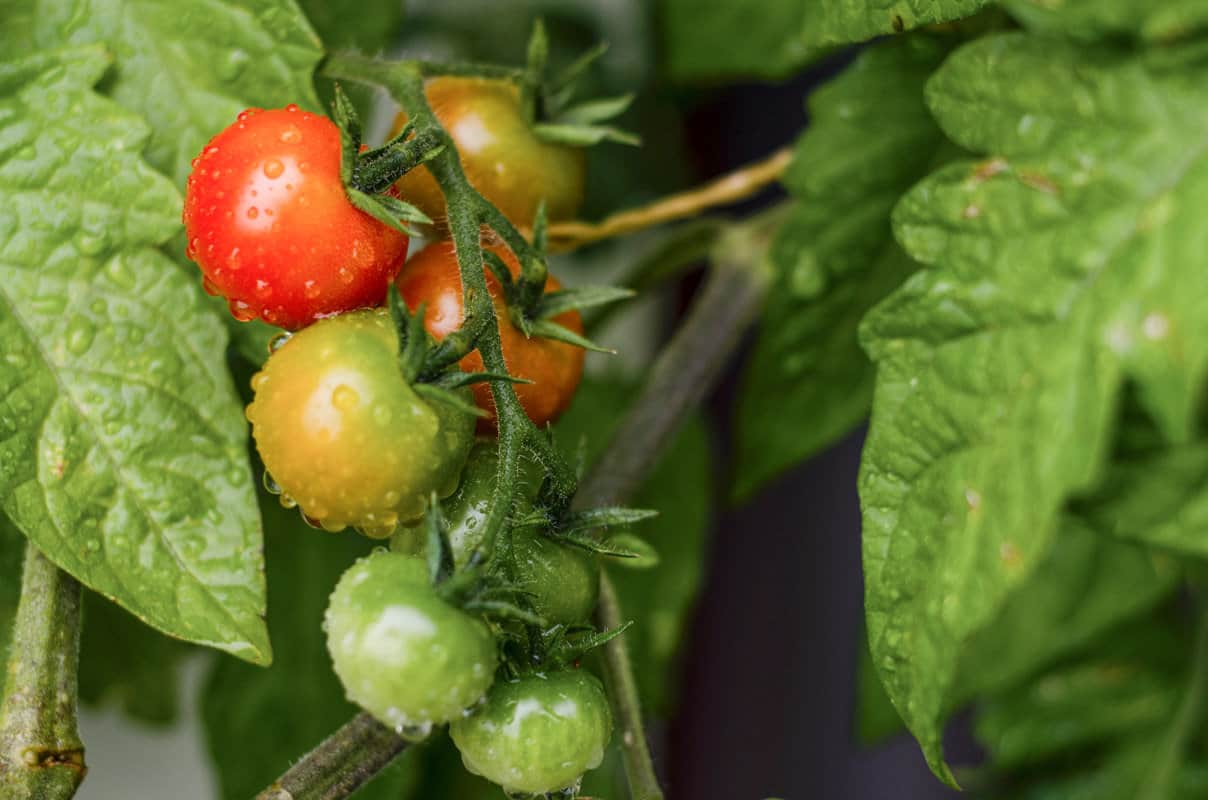
When to harvest tomatoes
Harvest tomatoes when they are fully ripened, have no more green spots, come off the vine easily, and feel supple. Tomatoes that need to be coaxed off the vine aren't ready, and tomatoes that feel a bit squishy are overripe (but still edible).
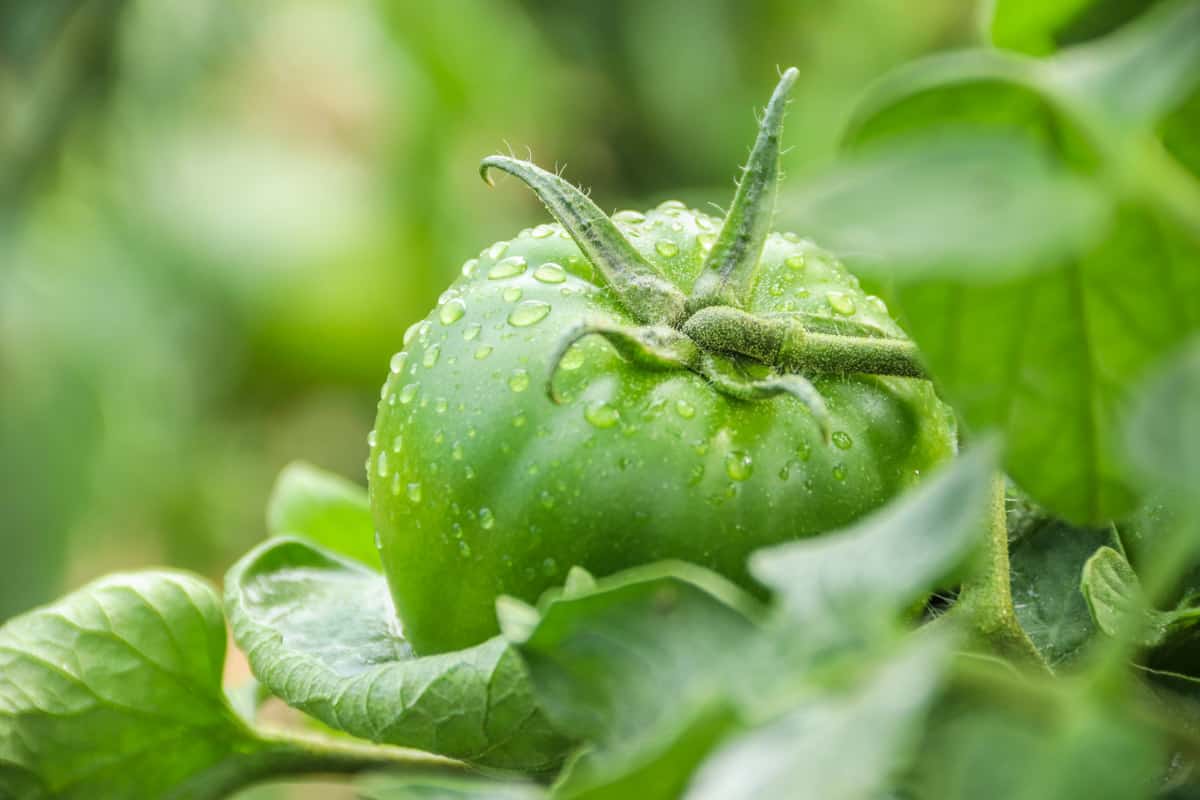
At the end of the season, indeterminate tomatoes will have some green fruits still developing. You can encourage the last few green tomatoes to ripen by pruning off all leafy growth shading them out. This will allow theme to get as much of the dwindling sunlight as possible.
If all else fails, green tomatoes are a treat unto themselves. They can also be pickled or canned, so it's worth plucking them off the vine before the first frost kills the plant.
When should I plant tomatoes?
Plant tomatoes two to four weeks after your last frost. The warmer nights and soil will make them happy, and you'll avoid the risk of a late frost or serious transplant shock. Tomatoes planted later usually outpace those planted prematurely, so it's not worth planting them out at the earliest opportunity.
How much sun do tomatoes need?
Tomatoes need full sun, so ideally eight or more hours of direct sunlight daily. Regular pruning and tying in can ensure that all of the leaves and fruit get the sun they need.
What is the best soil for tomatoes?
Tomatoes grow in rich, fertile, well draining soil with lots of compost or organic matter. They'll grow well in an all purpose raised bed mix or vegetable potting mix with added compost.
To plant tomatoes in the ground, prepare the soil by loosening it and adding a generous amount of compost and drainage, if needed. Vermiculite and perlite are excellent for drainage in pots, and sand or grit works well in the ground. If you have clay soil, it's worth thoroughly digging the bed over; tomatoes won't tolerate any soil compaction.
Tomatoes prefer a slightly acidic soil (pH 6.2 to 6.8), but they're excellent growers in most soil mixes. There's no need to try to amend your soil to adjust its pH, especially if you're planting into the ground; it's a losing battle.
How long does it take to grow tomatoes from seed?
Tomatoes can take 60 to 100 days to produce fruit, depending on the variety. When grown from seed, they take about a week to germinate. They typically set their first flowers within a month of putting up leafy growth, and it can take anywhere from a few weeks to a couple of months for fruits to mature after pollination.